Are you familiar with taking screenshots on your iPhone? With the release of iOS 11, Apple made a powerful tool available to all iPhone users—screen recording. While it doesn’t come standard, and Apple hides it away for you to find, it’s not too hard to record your screen.
Screen recording makes it possible to create videos of what’s happening on your iPhone’s screen. This can be used in a host of different scenarios, from troubleshooting a tech issue to creating a tutorial video. Read on to learn how to screen record on the iPhone.
Requirements and Specifications
Recording a screen on your iPhone comes with certain requirements and specifications that must be met. The following requirements and specifications must be followed in order to successfully screen record on your iPhone.
- iPhone Model: The screen recording feature is currently available on iPhone 6s and newer.
- OS Version: You must be running at least iOS 11 for the feature to work.
- Quality: The maximum possible quality of a recorded video is 1080p.
- Storage: Make sure that your iPhone has enough storage to save the screen recording. A 15 second recording takes up to 250MB of storage.
Once you have met all the requirements and specifications, you are now ready to screen record on your iPhone. Now let’s learn how to do it.
Steps to Screen Recording on iPhone
Recording your iPhone screen can be a great way to share online tutorials, document bugs, or have fun capturing gameplay. With just a few taps on your iPhone, you can quickly start recording your device’s performance. Here are the steps to record your iPhone’s screen:
Step 1: Enable Screen Recording
The iPhone Screen Recording feature is available in the Control Centre. To enable this feature, you have to go to Settings > Control Center > Customise Controls and add Screen Recording to the list of controls.
Step 2: Activate The Screen Recording
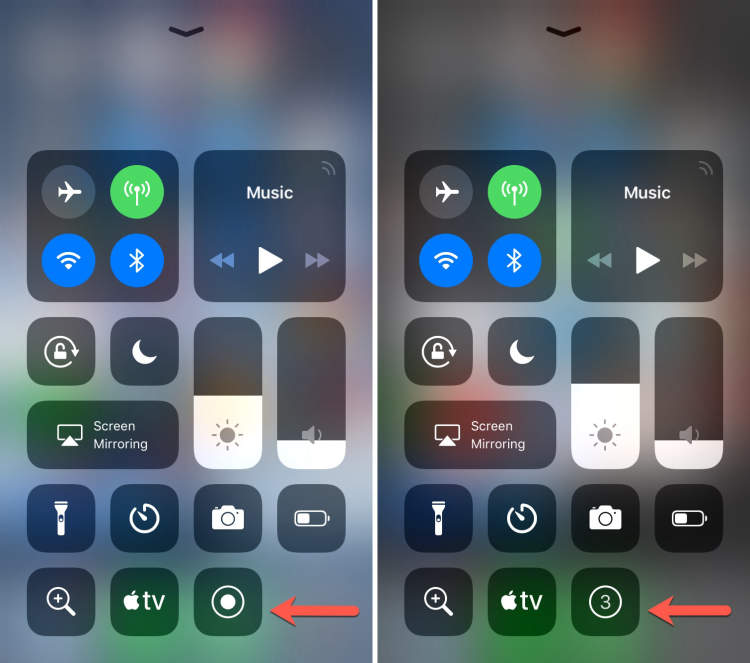
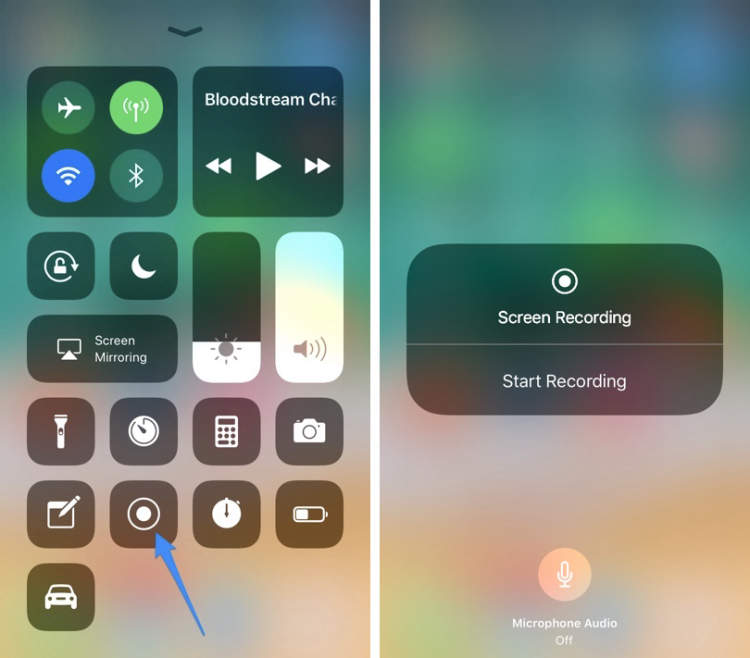
Once enabled, you can easily access the Screen Recording feature from the Control Center. You can swipe up from the bottom of the screen, or press the Home and Power buttons together to open up the Control Center. Now tap on the Screen Recording icon to start the process.
Step 3: Record Your Screen
- The recording will start and the timer shown in the red circle in the upper-right corner of the display will start counting.
- You can also enable the microphone by tapping on the microphone icon at the top of the screen. This allows you to record sound while recording your screen.
- You can stop the recording at any time by tapping on the red status bar.
- The recording will be saved automatically in your Photos app.
How to Edit Your Screen Recording
Once you have successfully recorded your iPhone screen, editing your footage can give your video a professional look. You have lots of options when it comes to editing your screen recordings, and with the right software your results can wow your viewers. To get started, you’ll need an editing app that’s compatible with your device and can work with your video format. Some of the most popular video editing apps include iMovie, Adobe Premiere Rush, and vidIQ Vision for YouTube.
Here are some basic instructions for editing your screen recordings with the help of these apps:
- Import your recording into the application you are using.
- Edit any sections you want to remove, rearrange, or add.
- Add any transitions, filters, titles, music, or scrolling text.
- Review your final video to make sure everything looks great.
- Export the final video file and upload it to your desired platform or website.
Editing your screen recordings can help your final product look more professional and make sure that your content is up to your standards.
Conclusion
Screen recording on your iPhone is a great tool to capture audio or video from your phone and save it for later viewing and sharing. This is a useful option for people who need to record interviews, capture meetings, or store special moments. With a few simple steps, you can easily record your iPhone screen and store it for future use.
Learning how to screen record on your iPhone is not difficult, as long as you have the necessary software and hardware. With the right settings, you can easily create high-quality recordings and keep them for later. Whether you’re a professional, a student, or just someone who wants to capture special moments, being able to screen record your iPhone gives you an excellent way to save and share audio and video content.