How To Easily Transfer Your iPhone Data To Another iPhone

Gone are the days when transferring data from one smartphone to another was a tedious task. With the availability of various devices and operating systems, transferring data from one device to another has become increasingly simple. This article will walk you through how to easily and quickly transfer data from your iPhone to another iPhone.
Whether you are upgrading your device or simply making a switch to a newer model, the transfer of data should be a seamless and stress-free process. By following the steps mentioned below, you’ll be able to transfer your contacts, photos, music, videos, application data, and more without any hassle.
Preparing Your Old iPhone
Moving data from one iPhone to another isn’t as difficult as you might think. Before you begin, it’s essential that you prepare your old iPhone for the transfer. Here are some steps to help you do just that.
Back up your Old iPhone
Before you can transfer your data, you need to back up your old phone. You can either do this using the iCloud app from your iPhone or use iTunes on your computer. If you use iCloud, your data will be automatically backed up. If you choose to use iTunes, these steps will help you make a successful back up:
- Connect your phone to your computer using a lightning cable
- Open the iTunes application
- Click on your device icon and choose the “Back Up Now” button
- Once the back up process is complete, click on the “Done” button
Reset Your Old iPhone
Once you’ve backed up your old phone it’s time to reset it. This will delete all of the data on your phone, so be sure to double-check that you’ve backed up all of your important files. This process is simple; just follow these steps:
- Go to the Settings tab
- Choose the General tab and select “Reset”
- Select “Erase All Content and Settings”
- Type in your passcode and click “Erase” to confirm
At this point, your old iPhone is ready for data transfer.
Transferring Data from Your Old iPhone to a New iPhone

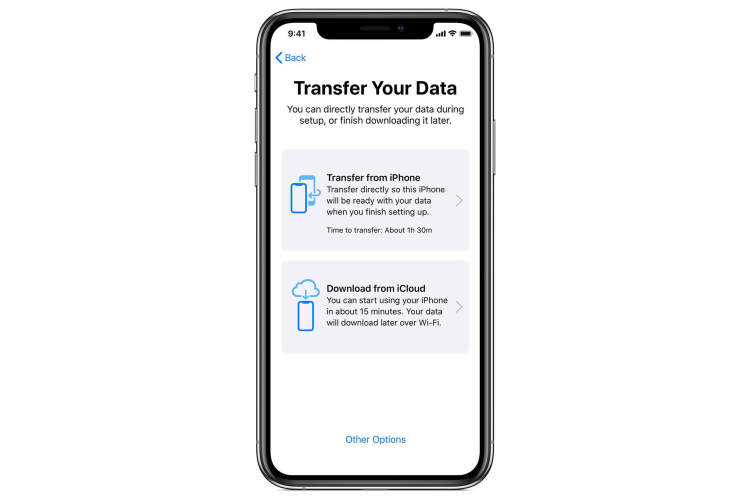
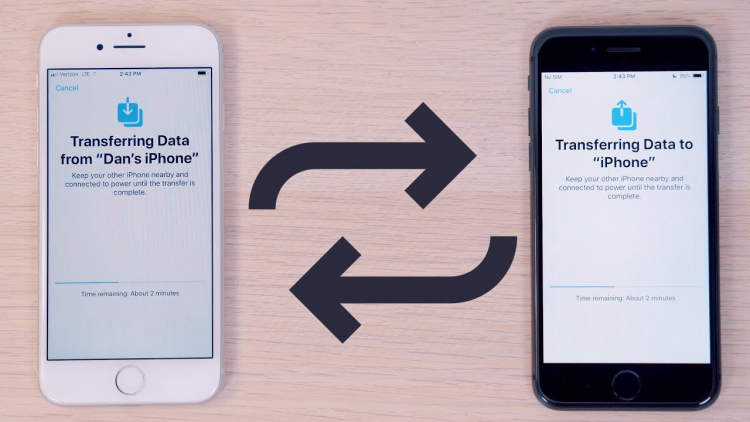
Getting a new iPhone can be an exciting yet daunting experience. Before you can set up your new device and start using it, you need to make sure you’ve transferred your data from your old phone. This will make sure your new device has the same contacts, messages, photos, and other items you’re used to. Read on to learn how to easily transfer your data from your old iPhone to a new one.
Using iCloud
One of the simplest ways to transfer your data from an old iPhone to a new one is to use iCloud. This cloud backup service saves your contacts, photos, messages, and more, and allows you to quickly restore your data to your new device.
In order to use iCloud to transfer your data, your old phone needs to be running iOS 5 or higher. To begin the data transfer, launch the Settings app on your old iPhone and tap the iCloud option. From here, you’ll need to turn on all the services you wish to transfer. This can include Messages, Calendars, Photos, and more. When you’re finished, tap the Backup Now option to begin backing up your data.
Once your old device has finished backing up, move on to your new device. On this phone, launch the Settings app and then select iCloud. You’ll be prompted to enter the same iCloud account you used with your old device and then tap the Restore From Backup option. You’ll then be given the option to select the backup you want to restore, and the process should begin automatically.
Using iTunes
If you’re not a fan of the cloud, you can use iTunes to transfer your data manually from your old iPhone to your new one. This method is not as fast as iCloud, but it gives you more control of what data you transfer. Keep in mind that this method requires your old device to be running iOS 4 or higher.
To begin, connect your old iPhone to your PC or Mac and launch the iTunes app. When prompted, select the option to trust the device and then click the device icon that appears in the top bar. On the resulting window, select the Summary tab and then click the Backup Now option. When the backup process is complete, select the Encrypt Local Backup checkbox and enter a password if you wish to password-protect your backup.
After you’ve completed the backup process with your old device, move on to your new one. Connect this device to your computer and launch iTunes. Choose the Restore From Backup option and then select the backup you just created. iTunes will guide you through the process of transferring your data to your new device.
Using Third-Party Apps
If your old and new iPhone are both compatible with iOS 8 or higher, you can use a third-party app to help you transfer your data. These apps are available for both Windows and Mac, and they usually have a drag and drop interface that makes data transfer easy to do.
To begin, connect your old iPhone to your computer and launch the third-party app. If prompted, choose the option to trust the device and then select the data you wish to transfer. This can include contacts, messages, and more. When you’re ready, drag the data to your new device and the transfer process should begin automatically.
Conclusion
Transferring your data from one iPhone to another doesn’t have to be a difficult process. You can use iCloud, iTunes, or a third-party app to quickly and easily transfer your data. Whichever method you choose, you’ll be able to enjoy all your old data on your new device in no time.
Setting Up Your New iPhone
Getting a new iPhone is an exciting prospect, but what comes next? Setting up a new iPhone can sometimes be a bit of a challenge, but with a few simple steps it doesn’t have to be. Here’s what you need to do to get your iPhone up and running.
1. Activate Your iPhone
The first thing you need to do is activate your new iPhone. This can be done either through iTunes or by connecting to Wi-Fi. If you choose to connect to Wi-Fi, you’ll need to enter in your Apple ID and password to complete the activation process.
2. Set Up Your iPhone
Once your iPhone is activated, it’s time to set up your new device. This process includes things like setting a passcode, choosing your preferred language, and selecting a Wi-Fi network. You’ll also be asked to agree to Apple’s terms and conditions. After that, you can either set up your device as new or restore from a backup.
3. Restore from a Backup
If you choose to restore from a backup, you’ll need to connect your new iPhone to your computer and select the suitable backup. This can be done either through iTunes or iCloud. Once the device has been restored, you can then move onto the next step.
4. Transfer Your Data
The last thing you need to do to get your new iPhone fully set up is to transfer your data. This can either be done through iTunes or iCloud. If you choose to do it through iTunes, you’ll need to connect your old iPhone to your computer and select the “Back up now” option. You’ll then need to connect your new iPhone to your computer and select the “Restore from this backup” option.
5. Enjoy Your New iPhone
once everything is done, you can now enjoy your new iPhone and all the amazing things it has to offer!
Conclusion
The process of transferring data from one iPhone to another has been made much simpler by Apple with the advent of iCloud and its various features. By using iCloud and enabling its features, you can quickly and easily transfer data from one iPhone to another in a matter of minutes. You also have the ability to selectively choose what data you want to transfer, making the entire process more efficient and timely.
Using the steps provided in this article, you can effortlessly transfer all your data, from contacts to photos and music, from one iPhone to another. This process is essential for upgrading to a new iPhone or transferring your data to another person’s device.
Post a Comment for "How To Easily Transfer Your iPhone Data To Another iPhone"