How to Change Your iPhone Name in 5 Easy Steps
Do you want to change the name of your iPhone? Fortunately, it is super easy to do so, and you don’t have to be a tech expert to do it. In this article, we will show you how to change your iPhone name in five simple steps.
All devices have names, and the name of your iPhone appears on the network settings. This is useful if you want to connect with friends, family, and other devices. If you want to stand out, you should change it to something a bit more creative. Read on to find out how you can make this change and make your iPhone even more unique.
Step 1: Open the Settings Menu on the iPhone
The first step to change your iPhone name is to tap the “Settings” app located on the home screen of your phone. This will open the settings menu which contains all the additional settings and tools for your phone. If you can’t find it, you can search for it in Spotlight Search, or you can ask Siri to open it for you.
Once you’ve opened the settings menu, you’ll see a list of settings options you can choose from. You’ll need to scroll down until you see a section called “General”, and then tap it.
Step 2: Select the General Option
The next step to change your iPhone name is to select the “General” option in the Settings app. You will find the General option in the top left corner. When you tap on the option you will be presented with various settings that can be adjusted. In the General option, you will see several sub-options including Airplane Mode, Wi-Fi, Do Not Disturb, and Cellular. Scroll down on the page and look for the “Name” option.
Once you find the Name option, tap on it and a text field will open up. This is where you can change the name of your iPhone. Enter the desired name, preferably a short one, in the text box and tap “Done” to save the changes.
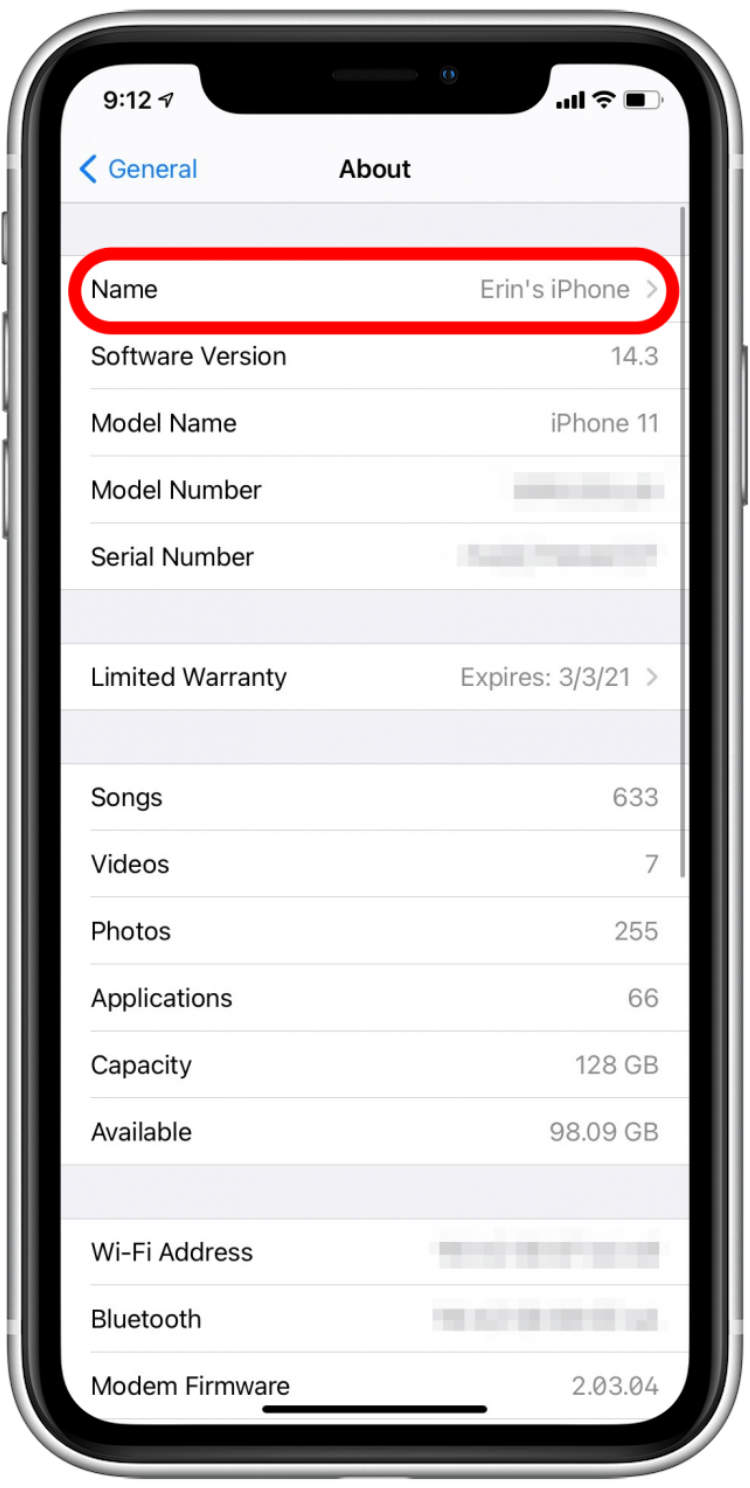
Step 3: Tap the About Option
To begin to change the name of your iPhone, open the settings panel by clicking on the menu icons on the home screen. Then open General settings, and scroll down to the bottom of the list. You will see the About option. Tap on this option.
This will open a new window which allows you to rename your device. In the Apple ID area you will see a field labelled ‘Name’ which is currently set to the name given to the phone during the setup process.
Now that you’ve opened the About window, you are ready to start changing the name of your iPhone. Here’s a brief summary of the steps:
- Tap on the ‘About’ option.
- Edit the ‘Name’ field.
- Tap the ‘Done’ button on the upper right-hand corner of the screen.
- Confirm the name change.
- Check for the new iPhone name.
Step 4: Choose the Name Option
Once you have selected the device you wish to rename, a new menu will appear with the option to either change the device’s name or forget the device. Choose the “Rename” option, which will then prompt you to change the name. The new name is limited to up to 15 characters, and it should be easily recognizable as your iPhone.
Make sure any special characters such as commas, apostrophes and hyphens are not used as they will not be accepted. Once you are happy with the name field, tap “Done” to complete the change.
Step 5: Enter the New Name for the iPhone
The final step in the iPhone name change process is to enter the new name for your iPhone. Before you do so, make sure it’s a unique name that no one else is using. If you choose a name that is already being used, you won’t be able to change it until you select a new one. In order to enter the name, simply go to Settings and select ‘General’, then ‘About’, and then ‘Name’. Enter the new name of your iPhone and click ‘Done’. Congratulations, you have successfully changed the name of your iPhone!
Conclusion
Changing the name of your iPhone doesn’t have to be complicated. With just a few simple steps, you can have a personalized name for your device in no time. You can easily change the name of your iPhone to any name you choose, making it easier for you to remember and identify your device quickly.
Additionally, you can also customize the names of your Bluetooth and Wi-Fi networks to make it easier for you to connect with other devices. We’ve outlined the steps required to change the name of your iPhone, and now it’s up to you to take action and give your device the right name that you desire.
Post a Comment for "How to Change Your iPhone Name in 5 Easy Steps"