In this era of permanent digital connection, it is more important than ever to keep your personal photos private. With the rise of social media and on-demand services, it is easy to forget the need for secure digital safety. However, photos on your mobile device can be easily accessed without any restrictions, so it is crucial to take the right steps to secure your photos on your iPhone.
This article describes how to keep your photos private through a variety of methods, but there are also considerations you should make with security functioning and how to decide which mode is best for you. Read on to gain valuable insights into how to protect your photos on iPhone.
Set Up Pin or Password
For those who want extra security for their private photos, setting up a passcode or PIN on your iPhone can be a great way to keep your photos safe. Doing this helps prevent unwanted access to your photos from someone who might’ve stumbled across your phone. Follow the easy steps below to learn how to set up a passcode or PIN on your iPhone:
Steps to Set Up Passcode or PIN:
- Open the Settings app on your iPhone Home screen.
- Tap Touch ID & Passcode.
- If you haven’t set up a passcode already, you’ll be prompted to do so. You can create a four-digit pin or a complex password with capital letters, numbers, and symbols.
- Enter the PIN or password twice to confirm.
- Once you have entered your passcode, you’ll be given the option to customize settings like requiring the passcode right after locking the device and the time it takes before your phone automatically locks itself.
- Once you are finished making your changes, tap the Back button until you’re back at the Home screen.
Now your photos are protected by your newly created PIN code or password. It is important to remember to use a secure passcode or password that nobody else can guess. It’s also important to avoid using easy-to-guess sequences such as “1234”.
Enable Photos Permissions
The iPhone offers various features to help you keep your photos and videos private. By enabling photo permissions, you can control who has access to your photos and videos stored on your device. Here’s how to enable these photo permissions so that your pictures are safe.
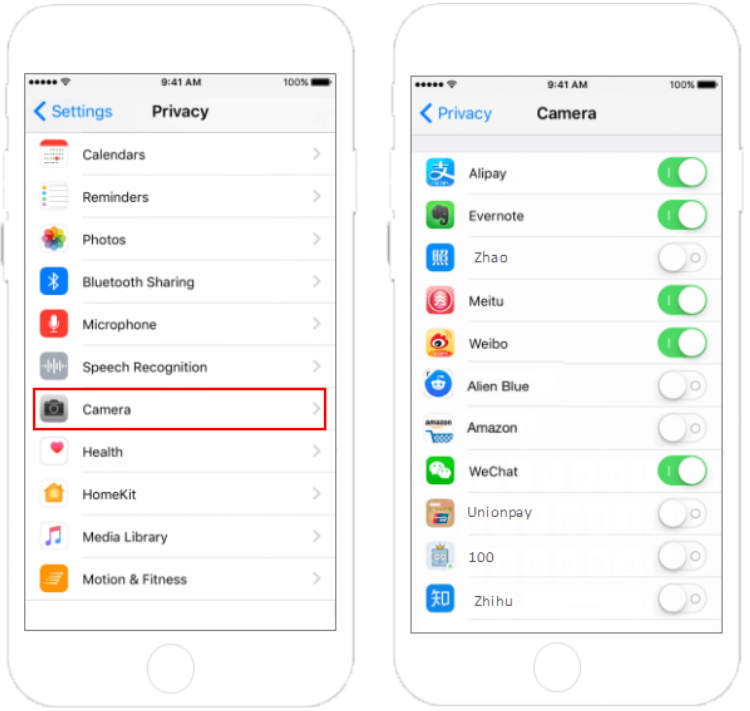
Steps to Enable Photos Permissions on iPhone
- On your iPhone, open the Settings icon.
- Select Privacy, then select Photos.
- Next, tap Enable Read and Write. Now you can decide who can access your photos.
- You have several permissions to choose from, including allowing access to your photos from the Photos app, iCloud Photo Library, and other apps that use photos. You can also allow people to make changes to your photos.
- Once you have finished selecting which photos permissions to enable, tap Done.
By following these simple steps, you can ensure that your photos on your iPhone are kept private.
Create an Album and Keep it Private
In the world of digital photography on iPhone, it is not difficult to keep your photos private. Here are some steps you can follow to create your own private album on iPhone and keep them safe.
Step 1: Create a new album
The first step is to create a ‘Photo Album’, on your iPhone. To do this, open the Photos app and go to ‘Albums’ tab. Select ‘Add’ and create a new album with a descriptive title.
Step 2: Add photos to the new album
Once the album is created, you can add photos from your camera roll to it. To do that, open the album, select the photos you want to add, and hit ‘Done’.
Step 3: Keep the album private
To keep the album private, open the ‘Photos’ app and select the album from the list. From the album’s page, tap ‘Options’ and then select ‘Enable Face and Object Recognition’. This will make the album password protected.
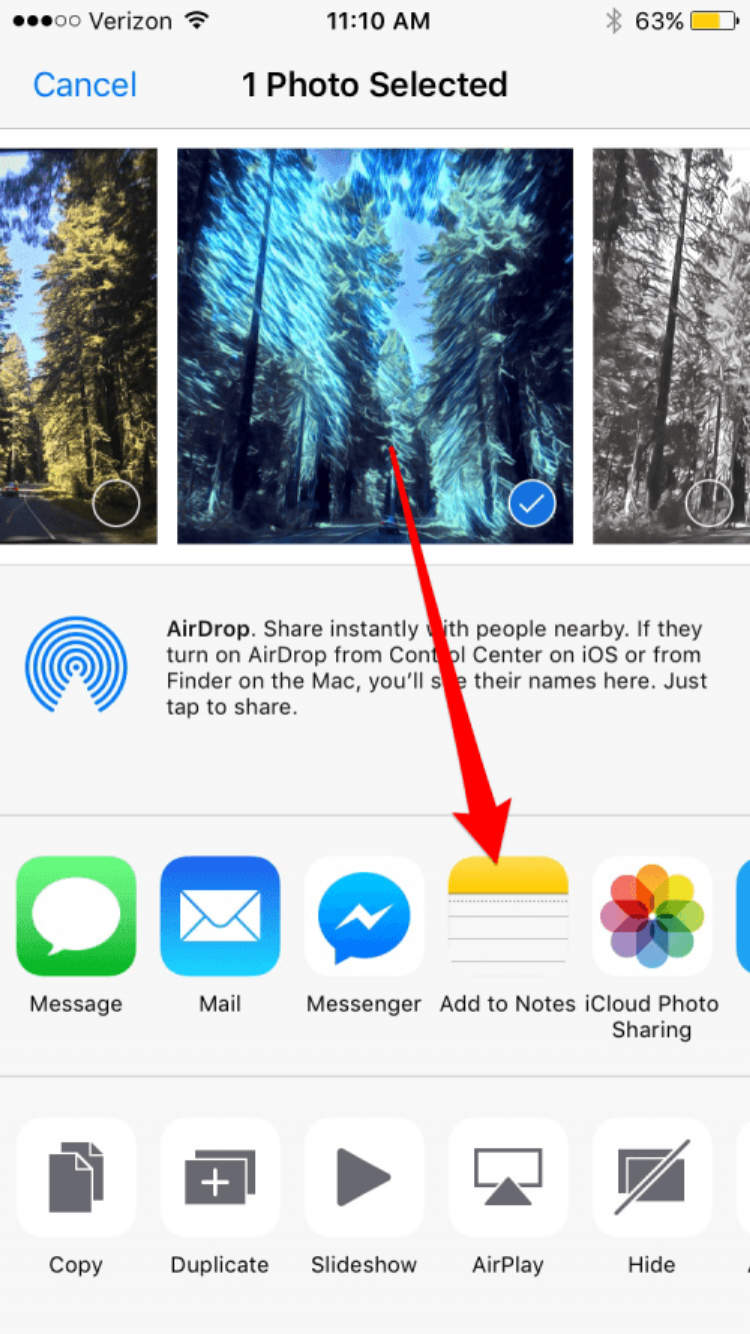
Step 4: Enable iCloud Photo Sharing
By enabling iCloud Photo Sharing, your album will be backed up and synced across all your devices. To enable this feature, open the Photos app and go to Settings. Then tap ‘iCloud Photo Library’ and select ‘Enable iCloud Photo Sharing’.
Step 5: Share the album with selected friends
Once the album is created and synced, you can share it with selected friends and family. To do this, open the Photos app and tap the album’s cover. Then tap ‘Share’ and select the people you want to share the album with.
Step 6: Adjust the album settings
Finally, you can adjust the album’s settings and privacy. To do this, open the Photos app and go to ‘Options’. From there, you can select who can view, comment, like, and share your album.
Conclusion
iPhone makes it easy for users to manage their photos, but they must remember to keep their data secure. By using some easy-to-implement steps, including creating complex passwords, taking advantage of security settings, and using privacy-protecting apps, users can take additional steps to ensure their photos remain private.
By following the tips above, users can be sure that their personal and sensitive photos will remain secure on their iPhone. With the peace of mind that comes with a secure online presence, users can fully enjoy the range of photo-editing and organization options available on their devices.